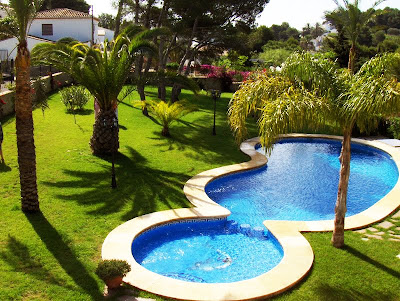
The first tutorial I am going to show is just some simple techniques which are great for enhancing the overall look of an image/photo. This is especially useful if you take a digital photo and it comes out washy or doesn't have the colour you were hoping it would.
For this tutorial I am going to use the image below of a Villa garden in Spain;
To begin with, open photoshop, go to 'open' and select the image you want.
Next, go to Image > Adjustments > Brightness/Contrast... as shown below.
You will get a small window appear with 2 slider bars on it, one for brightness and one for contrast. As default they will both be at 0 in the centre. After adjusting them both a few times in different places, i found this to be a nice setting for my particular image;
However this is not necessarily the 'right' setting for all images using this technique, experiment with different slider positions with your own image until you have the results you want.
Below I have made a cross section image, so that you can compare the image before the adjustments and after. Before is on the left and after is on the right. It is only a minor adjustment, yet it makes the image look more vibrant and interesting to look at.
Next I am going to show you the "Colour Balance" tool.
Again, go to Image > Adjustments, but this time select the Colour Balance from the menu. This can be accessed via the keyboard shortcut "Ctrl + B".
This is the window that you should see:
This tool is very useful if you have one or more photographs that, for example, have a blue tint to them due to the lighting at the time of being taken, and this tool will enable you to change the balance of the colours in the entire photograph, thus enabling you to remove any unwanted colour noise in your photos. However it is also a very sensitive tool, as you will see if you have a play around with the sliders, it can completely change the colour of your image, so you will usually only need to adjust the sliders by small margins.
Also note the "Tone Balance" area at the bottom of the box. This is to tell it whether you want to adjust dark colours, midtone colours or pale colours within the image.
As my image has relatively well balanced colour, I have only adjusted the colours very slightly:
Before After
So there you have it. Simple photo manipulation in Photoshop CS4
If you have any questions then please post comments asking and i will reply to them as soon as possible :)
Below is the image before and after so you can see the difference:


